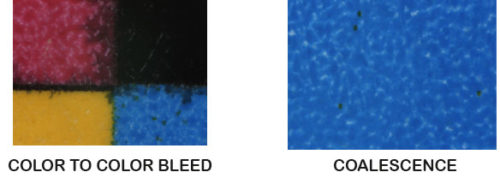
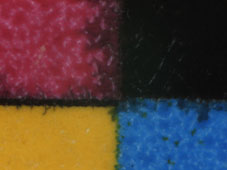
We got a lot of good feedback on Elizabeth’s post on “Peanut Butter and Workflow” so I thought I would keep the sandwich metaphor going. When using pre-coatings and post-coatings with inkjet, you are creating an inkjet sandwich served on a paper plate. Each layer of the sandwich can make the ink spread and dry unevenly if not managed before profiling, creating a soggy sandwich.
When evaluating ink to substrate compatibility it is important to consider how the ink can react to the substrate with all of the possible fluids involved in your process. If you are using any type of pre-coating or post-coat protectant, either jetted or applied by anilox, you must evaluate how the ink will perform with all fluids included. This evaluation should happen previous to any linearization or color profiling. (Take a look at this previous post if you need are refresher on linearization)
Adding more fluids to an already wet process can cause some ink to ink compatibility issues such as color-to-color bleed and coalescence.

Each of these compatibility issues, are common when printing on inkjet coated or offset coated papers with an inkjet receptive pre-coating, as well as when adding any protective post coating fluids. Unfortunately, much of the time these reactions may not be noticed by the pressman. When printing CMYK combined color bitmapped images, the issues can be hard to spot. However, when images contain 3 or 2 color combinations, or text and lines, your image sharpness can start to look a bit fuzzy. No amount of linearization or profiling will help with this.
Color to color bleed and coalescence can be caused by the volume of ink and its reaction to the base paper or pre-coating. If the ink is still tacky when post coat is applied, you may discover rewetting of the ink or an orange peel effect where higher ink density percentages are not dry. Before you try to linearize or profile, you need to understand exactly where this is happening. Conducting your paper testing with all fluids required in your process is critical. If you see the above affects, start to peel back the layers to find the cause, or causes.
If you see these effects, start at the end by turning off the post-coater. If the issue is lessened or eliminated, then you know post-coating has influence over the ink. Without post-coat, deep dive into how each ink is responding by evaluating primary, secondary and tertiary colors with just pre-coating. From here it is an iterative process of adjusting the inks and the pre-coating to find the balance which achieves compatibility for the combined fluids.
An inkjet sandwich can deliver excellent quality when all of the ingredients are fully understood. The lesson here is to ensure each that each layer is compatible with the base layer, and any other layers, before adding the top layer.
Now, get out your loop and look closer at what you have been printing. Is it an inkjet sandwich you can be proud of, or is the image quality a little soggy?
Mary
P.S. I’d like to hear about your success in expanding your range of available papers with pre-coating or post-coating. Please get in touch.

